..................................................................Click on a photo to connect to my Flickr page to see more of my art! ............................................................................

Monday, December 10, 2012

How to Chip A Plate to Mosaic with the Full Plate

   Happy holidays and Merry Christmas! I recently did a search on the Internet for "how to chip up a plate" so you can mosaic a full plate onto something like a table-top or lazy Susan or serving tray or... Take a look at this link to see some mosaic art that uses this technique:  http://myeuropeantouch.blogspot.com   Anyway, I was saying that I recently did a search to see if there were many sites where one could go to see a step-by-step-how-to on chipping up a plate while keeping it in the shape of the plate. I did not find much. Perhaps You Tube may have some tutorial videos and perhaps there were sites out there but my search terminology did not access them. Regardless, I was inspired to do one myself!

   I began by chosing a plate from my stash and I decided I would take photos as I chipped up the plate. It was a challenge as I have not chipped up a plate while trying to keep all the pieces in the same places as they were originally! As most of us who use plates are aware, plates are not completely flat and they have a very thick area around the bottom of the plate, which I will call it's "seat line"- the part of the plate that actually touches the table top. These are hurdles to overcome when chipping up a plate. So, I share with you my experience:

 
 I knew that a plate with distinctive designs and pictures on it would help me when trying to keep all the pieces in order. Many people will mix in pieces from different plates- this tutorial is just how to chip up one plate and use the whole plate. TIPS: As you chip up the plate, keep it in it's original position and be careful to remember how each piece went in the "puzzle" when you pick it up to chip it. Also, take a photo of the whole plate before you begin to chip it, so you have the original to go by. I would also recommend working on a towel or large piece of cardboard so that if you have to transport your chipped up plate you can, without having to move your pieces and get them mixed up. 
 
Step 1: Using nippers, chip the plate in half. By grabbing the opposite side than the nippers and applying pressure, it will help your crack line to go straight across.
 
Step 2: You now will have two main chunks. Chip those in half. If your "halves" ended up not being quite half, and you have one much bigger piece, chip that one in half as well. I ended up with 6 main chunks.


Step 3: Now, if the center of your plate is still in tact, chip it out. If there are any "tips" on your large chunks (like if they came out more like triangles than rectangles) then chip the tips off.


Step 4: Chip the main chunks in half again!
 
 
Step 5: Now we need to begin to make our plate lie more flat by chipping along that "seat line". Do this all the way around the plate.


Step 6 (2 parts): Let's put our focus on the outer most edge layer. First chip each chunk in half once more. Then, on this particular plate, there is quite a bit of curvature (see photo). If we chip this in half width-wise, we break up that curvature and the pieces can lie more flat. Do this all the way around.


Step 7: Now we will look at, what is now, the third layer inward. These are the ones that have our "seat line" on the bottom side. We need to chip those up into smaller pieces so those lay more flat as well.


It was at this stage where I discovered my plate was just too thick to continue using my wheeled nippers. My straight edge nippers open wider so I switched to those and I was back on track!
 
 
Here is what my plate looks like now after completing step 7:
 
 
Step 8: Last step! Now chip up the middle and the pieces around the middle to be smaller. Once you have those chipped up arrange all your pieces nice and tight and you can see the resemblance to the original whole plate!


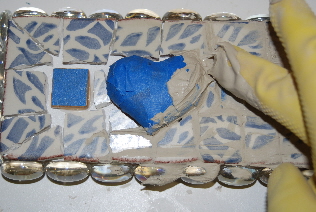
Now my plate is ready to be glued on or stuck in thinset mortar on to something! I am not sure what I will put this on...I do have a plant stand I've been wanting to mosaic...Happy chipping!


Wednesday, November 14, 2012

Local Mosaic Moments

I LOVE seeing art around town. I love that in my town, Chico, CA, there is art on the buildings, in parking lots, on benches, on newspaper stands, around doorways, in parks, and many other places. I especially love when the art is mosaic, and my town has a plethora of them! This month's post is about three, what I will call, "mosaic moments" in my town. The purpose of this post is just to look at cool mosaics and to get you, my reader, to look around YOUR town and notice some mosaic moments! I want to let you know that I did not do any research on who the artists were or when these mosaics were installed.
Here is the first: It is located on a wall at my son's school:
To me, it looks like a river running along the length of the wall. Also, along the wall are these cool medallions. Here are some close-ups:

 Isn't that pretty? The wall has these opaque windows about 16" wide and 12" tall that run along the top half of the length of the wall. The river flows right through those windows!
A portion of one of the medallions.


The second mosaic moment can be found around the doorway of a cafe here in Chico, called Cafe Flo. For those who are in Chico, Cafe Flo can be found at 365 East 6th St. The style of mosaic around this doorway is what is known as pique assiette, which is French, and, according to Wikipedia means, "one who eats from others' plates". Basically it is broken dishes and figurines...


For me, the more unique the dishes and figurines used, the better! This doorway has some zany things to look at. I've made some things in this mosaic style, and it is fun because you can kind of just come up with your design as you go. Sort of "stream of consciousness mosaic". At least that is how I approached it.

My final mosaic moment I will share (for now- I may start posting some more mosaic moments on my Facebook page "Kim Finlan Mosaics"), can be found at the entrance to our Kohls. I like this piece because it is done on pillars, and the pillars are angled so that depending on what angle you are looking at, the artwork seems broken up, or as one. Check it out:


Here are some close ups of the bird and the sun:


I hope you have enjoyed looking at these mosaic moments! If you like to look at pictures of mosaics then you would really love the mosaic groups on Flickr. Collectively, they have thousands of pictures of mosaics (mine are in there too!). Go to www.flikr.com, sign up and sign in, and then go to "groups" and search "mosaic". You will see group after group of mosaic art. I am in the "flickr mosaic artists" group. That oughtta keep ya busy for awhile...


Wednesday, October 17, 2012

How to...Make a Beautiful Mosaic Christmas Tree

For Crafters and Artists, Christmas projects have already begun! This project is fun, quick and fairly simple. What you need is:

Cardboard or styrofoam cone (mine was cardboard, 11" tall)
Fiberglass Mesh
Thinset mortar
A whole bunch of different small things to put on the tree (I used rocks, shells, beads, marbles, buttons, small ceramic figurines, jewelry, tiny Christmas ornaments)
large piece of paper
Q-tips
Water spray bottle


The first step is to cover your cardboard or styrofoam cone with a layer of thinset mortar on the fiberglass mesh. I simply cut out the fiberglass mesh to fit around the cone. Then I held onto the mesh around the cone with one hand while spreading on the thinset with the other hand. It "grabs" onto the mesh, which is on the cone, quite easily. Use your gloved fingers to smooth the thinset as best you can. Once the thinset is completely dry (24 hours), take a file and file all over the cone to smooth the surface. (The above photo shows the prepped cone). This gives you a solid base that will not only keep your tesserae on firmly, but strengthen the structure itself for a longer life.


   Take the large piece of paper and wrap it around the cone to get a fit. Trim off excess paper. Lay the cone "pattern" on your work table and use it to set up your tesserae, if you want to sort of plan out your design ahead of time. You could just stick stuff on to the tree without planning it out first, but I found I liked to move stuff around and try different things before I settled on what final design I wanted. Even with doing that, I still changed things a little when I was sticking things on.
   When you are ready, mix up a batch of white thinset mortar- mix a large batch- and generously smooth it on all over the cone. Try to get it between 1/8 and 1/4 inch thick. As you are placing things onto the cone, push them into the mortar. If you get excess mortar squishing out, gently scoop it off using a q-tip. For larger items, "butter" them on the back with  your extra thinset you made and then stick them on. It is important to keep your thinset moist as you are placing things onto the tree! Generously spritz your tree with water every few minutes.
   Another helpful tip: Place the cone up onto something while you are sticking things on. I put mine onto a shoe box just to elevate it enough so I could stick things on along the bottom easier, but also so I could spin the tree around without having to touch the tree itself.


The above photo is the finished product! If something happens to pop off after your thinset has dried you can simply glue it back on with either hot glue gun or Weldbond glue. This project is really two phases: 1) prep the cone with the 1st layer of thinset and mesh; 2) stick the tesserae on the cone with another layer of thinset. The first phase took about 30 minutes and then one day to dry, with another 10 minutes to file it smooth. The second phase took me about an hour and a half. So, all in all, this project is fairly quick and the results are stunning! I plan on making three more mosaic Christmas trees: a gold one, a red one, and a green one. Check out my Flickr link to see the finished products next month!

Friday, October 5, 2012

How To...Grout Without Staining Your Scrabble Tiles

Scrabble tiles are so popular to use amongst crafters and mosaic artists. They allow you, as the artist, to say something in your art. As a mosaic artist using grout, however, they can pose a problem as the wood sucks up the grout and becomes discolored. This month, I am posting a "how to" grout without staining your wood letter tiles. The answer is simple: cover each tile with blue painters tape before you grout!

For this blog post, I am including photos from a project I just completed. I wanted to make a little sign that said, "I [love] Chico" (Chico is my hometown). The heart I used on my sign is a painted styrofoam heart that I found at a yard sale. I needed to cover that as well so that the paint would not rub off the heart during the grouting process.
So, now that my pieces are covered, I can dive right in and grout just like I normally do. You do not need to avoid getting grout on the tape. The tape holds very well-- but not too well that it leaves residue behind when you want to take it off.

After the grouting is done, it's time to clean! I use my dry q-tips and clean off the excess grout. Sometimes I need to sort of "sculpt" or re-shape the grout here and there to porperly fill in all the spaces evenly and with clean lines, and to do that I use a wet q-tip (not too wet though- I usually dab it on a paper towel after dipping it in water). Then, once all the grout is cleaned off, you can peel off the painters tape. I use a toothpick to grab the corner of the tape up and then peel it off the rest of the way with my fingers.

The tape will lift some grout up here and there. If you need to, you can wet a q-tip and mash down and smooth out the grout along the edges, but do this carefully as it will get grout on the edges of your tiles. If you do get some grout on your wood letter tiles, you can take a q-tip and dip it in white vinegar, then dry it off a bit by dabbing it on a paper towel. Then clean off the wood tile with the vinegar. You may have to do it twice and you may still get some discoloration. I did not need to do any fixing of my grout after peeling off the blue painters tape. And my wood letter tiles looked just as clean as before I grouted!

And one final tip: If you notice my Scrabble tiles are blank besides the "O", it's because I did not have the letters I needed, so I simply used the back side. In the past I have then just painted on the letter and number onto each tile. But I am going to experiment with a wood burning tool to "write" on each letter. If you look at a Scrabble tile you will notice that the letter and number are sort of carved into the wood, rather than sitting directly on top. I want to try to match this look. If this works, I will write a blog about it and spread the word! Imagine...being able to use all those extra letter tiles like Q's,  X's and Z's, by flipping them over and making your own letter!

Monday, September 17, 2012

Getting Down to Business

   I am a mom. I drive a minivan. I am a stay-at-home mom who cleans and cooks and volunteers in my son's kindergarten class once a week. I personally struggle a little with being a stay-at-home mom. I know there are some mother's out there who are working and would love to stay home. I do love being a mother but I have such a drive in me, such a passion, such a thirst for accomplishment and making a difference in the world that I sometimes feel like I am wasting my life each and every day. Now I know that for my two children, my daily involvement in raising them will be fruitful in their lives. But the funny thing about people is that even if a kid is raised in a daycare they can still turn out to be a very awesome person! Where am I going with all of this?
    Well, I was recently forwarded a website that is dedicated to a documentary called "Who Does She Think She Is?" I have not yet seen this documentary, but the clips I saw on this website have been enough to inspire me to get down to business! First let me say that the documentary focuses on 5 women artists who are also mothers. Two of the artists in particular still have kids living at home but are very successful, working artists as well. Check out the website for yourself! http://www.whodoesshethinksheis.net/
   So what exactly do I mean when I say I am going to "get down to business"? I am going to treat my art as if I were going to a job. I am going to set studio work hours and, with my husband's support, will work in my studio every day. Some days it may just be one hour. Other days I may be able to do up to five hours. I already work in my studio but I treat it like a last-thing-on-the-list-to-do. So most weeks I only work in my studio one or two days per week for about 2 hours each time.
   The biggest encouragement I received from the clips I watched from the documentary is that I do not need to feel guilty about creating my art. I have been given this gift. Everywhere I have tried to turn as far as other career paths go, have been shut down...except my art. My art has been blessed and I sell everything I make. So, instead of searching desperately for a "job" so I can leave my mark, I am going to embrace my art, along with my stay-at-home-mother status, and leave an even more beautiful mark than I could anywhere else at this moment in time. If you need me, I'll be in my studio!

Sunday, August 26, 2012

Practical Tips for the Mosaic Artist

How cliche is it to start one's blog with a disclaimer? But, alas, I am. I am going to list some tips I have found helpful and useful during my time as a mosaic artist. The disclaimer is that I am giving these tips not under the authority of an art school degree or having been trained by so-and-so. These tips are just tried and true by yours truly.

Here are some tips for cleaning after you've grouted:

1. Use dry Q-tips to clean the grout off your mosaic.

Dry Q-tips?! Yes. I used to grout my piece then spray it with water and do the whole plastic-bag-and- sponge thing. But here is what I have found that actually works very good and is really much more quick to get results. Once you've grouted your piece, get a just ever-so-slightly damp cloth/sponge/paper towel and wipe off the piece so you can at least see the outlines of all your little tiles/pieces. If you are working a small project (maybe a square foot or smaller), you can then go ahead and take a dry q-tip and use it to clean off an individual tile or too. Once your q-tip is dirty, toss it and get another one. You should not need to use any water at all. If your piece you are cleaning is larger than one square foot, you should give the sections you are not cleaning a light spritz of water (one or two spritzes should work) every ten minutes or so. The trick with using dry q-tips to clean off the excess grout on your tesserae is that the grout needs so be drying already. If the grout is super wet still all you will do is drag it around when you wipe it with a q-tip. But you mustn't let your grout dry too much or the q-tips will not work. At that point only scraping it off will work! Yes, you will use a lot of Q-tips. But it works! (Buy in bulk!)

2. Put your hot air to good use

Let me explain. Once you have cleaned off each tile or piece with your dry Q-tips, and your grout is pretty much dry, then take a soft, dry cloth (I find that a good-old-fashioned clean cloth diaper- like the ones moms use as burp rags- works great!) and breathe on a small section of your piece. When I say "breathe on it" I mean to fog it up like you would fog up a mirror. Then, immediately use your soft cloth and polish that spot up. Small, gentle, circular motions work great. Once you've done that all over your piece you will be amazed at how shiny it is! I used to use vinegar to clean my pieces but I have found that plain old hot air works great. And it's free!

Here are some tips for using acrylic paint to color your powdered grout:

1. After you've dumped some powdered grout into your mixing dish, add just enough water that it starts to clump up here and there. Then add enough acrylic paint to finish the mixing process. In other words if it takes 2 parts grout to 1 part water to mix up your grout (let's say for example-it's actually less water than that but 2:1 is an easy proportion to work with in this example), then add 1/4 part water and 3/4 part paint to equal 1 part liquid you'll need to mix your grout. You may have to add a tiny bit more water or a tiny bit more paint to achieve the texture of the grout you desire.

2. If you are trying to lighten or darken your grout, your grout must be pretty close to the shade you are trying to achieve. I once took an almost beige grout and tried to add white paint to make my grout nearly white. I had to add so much white paint that my grout was too runny. So I'd then add more beige grout to make it not runny, but that only succeeded in making the color too dark again. So I was running in circles. Also, I once took white grout and added red paint to it to try to make very red grout. You colorists out there already know that I ended up with pink! Again, just as I'd added enough red paint to acheive the red I wanted, the grout would be too runny and so I'd add more (white) grout and then it would become too pink again. So stay close to the shade you want with the grout you use.

Here are some tips for getting FREE tesserae!!!

1. If you enjoy working with dishes, ceramics, figurines, jewelry or just about anything you can find at a thrift store then try this: Get a box or a basket and write your name and phone number on it. Then take it to a local thrift store (usually the one's for charity are more willing to do this), and ask them that anytime they get any boken dishes, figurines, etc. to put it in your basket instead of the trash. Then every week  or two (depends on how much inventory the thrift store deals with) call or stop by and see if you need to pick anything up. You will want to make sure you are consistent so that your basket isn't sitting there for weeks overflowing. Most charity thrift stores are happy to help out a local artist and see something that was going to go in the trash be repurposed for beauty. I do this successfully with two thrift stores in town and I am now bursting at the seams with stuff. I do get some things I don't want but instead of being a burden on the thrift store workers by giving them a list of what I want and don't want, I simply throw away or donate to a different thrift store what I don't want. You'll get a lot of coffee cups. Be prepared. But I also get some really nice china and figurines that broke and they just can't sell them.

2. Some communities have stained glass artists. You can contact them and see if they would be interested in giving you their scraps. My step-mom does this and gets so much stained glass scraps from this one lady that she gave me 3 boxes of the stuff because she had so much! You might be able to locate stained glass artists through your local art organization, or even in the phone book under stained glass (my community phone book lists 6 businesses in the yellow pages under that category!).


I may have to do another post on tips because I didn't realize how many I had! So, for this month, I hope you can find some use out of these tips because I sure have! Pass it on!

Saturday, July 7, 2012

The Amazing Durability of Mosaic

   I just read about something that I think is pretty awesome. Let me preface the "awesome-ness" by reminding you that I am a mosaic artist (hence the name of my blog, "Mosaics by Kim Finlan"), and so I am very drawn to anything about mosaic. The awesome thing I read about was that an archelogist, on his first ever dig no less, uncovered a 1500 year old mosaic that was on the floor of the ruins of an ancient Jewish temple. The online article I read shows an image of the mosaic. In this mosaic, "two female faces flank a Hebrew inscription about rewards for people who perform good deeds" ( http://news.yahoo.com/ancient-mosaic-depicting-fiery-bible-story-discovered-163828071.html ). Click on the link in the parentheses to read the whole article. The mosaic, at least the portions left of it, are in amazing shape considering how old they are. They are estimated to have originated between 400 and 500 A.D. I was looking at the photo and analyzing the hand-cut pieces and noticing the shapes, use of coloring and space between each "tile" and noticed the obvious: many aspects of creating a mosaic haven't changed for hundreds of years. Mosaic artists over the centuries share these techniques in common as if it were an ancient language we all speak together. Mosaic has immense appeal to many artists, for one, because of the durability of it. The knowledge that your mosaic mural or floor will last potentially hundreds of years makes the hard work put into it a little more satisfying (in this writer's opinion). That must've been pretty exciting for the archeologist to behold artwork from 1500 years ago. I wonder if he moonlights in mosaic art? That would make that mosaic find even better!
 

Saturday, June 2, 2012

Taxes! Taxes!

What makes someone an official artist? You might hear many different answers if you asked this question to many different people. For me, I have been on quite a personal and emotional journey to the end of this question. I crossed over in to "artist status" in my own view just about a year ago. It was a result of much thinking and some successes in some art shows that led me to this decision. I say "decision" because that is what it was. I decided, one day, that I was now an artist, rather than a person-who-dabbles-in. Recently, however, I have come to the point where I must become official with the government. In other words, we must pay taxes on the income generated by our art sales, as well as pay sales tax on each item sold.

If you are curious if you should become an official artist in the government's eyes, and you happen to live in California, USA as I do, take a look at what I found out from the State of California Board of Equalization website http://www.boe.ca.gov/index.htm . If you don't live in CA, but you do live in the USA, look up your state's Board of Equalization website and find the section that talks about sales taxes. I learned that I must obtain a "seller's permit" in order to sell art in CA! I have sold my creations for a few years now through consigning them at a very cool store here in my hometown. Because the store takes care of dealing with the sales tax, I never had to get a seller's permit before. But this year, I want to take part in an open studios art tour, and we are required to collect our own sales tax. I copied and pasted the following directly from the CA BOE website, off the CA seller's permit application:


                  Who must have a permit?

             You are generally required to obtain a California seller’s permit if you sell or lease merchandise, vehicles, or other tangible personal property in California. A seller’s permit allows you to sell items at the wholesale or retail level. If your sales are ongoing, you should apply for a "Regular" permit. If your sales are of a temporary nature (90 days or less), apply for a "Temporary" permit. You cannot legally sell taxable items in California until you have been issued a seller’s permit.

I know that this information is specific for my state I live in, but this blog post may get you thinking about what you might need to do to make sure you are legally selling your art where you live! And if you are wondering what makes you an "official" artist, I say that you decide in your own heart. You don't need sales, or a permit or business cards to make you an artist. Being an artist is a frame of mind and a way of seeing life and expressing yourself. It is more than just "crafting" for fun because you literally see, think and taste art as an artist. It is who you are from the inside. It is how you see the world around you. And it is that drive and desire to create something and so you do! To me, those things are characteristics of a true artist.
 

Friday, May 11, 2012

Art Fiesta!

Picture this: a beautiful, rustic, old, Spanish-style motel that screams character. Tall, 50 year-old palm trees decorate the open courtyard that houses the pool. The rooms, though a bit musty, take you back in time with gothic arch cut-outs in the walls, the Spanish tile showers and lead-plated glass windows. Now picture this same motel taken over by dozens of artists. Inside the rooms, artists set up  mini-galleries. Outside, in the grassy courtyard, pop-up tent booths surround the gated pool. A Cantina and Taco truck flank the south side. A man sits under a tent and plays beautiful, calming, Spanish-style guitar. THAT, my friends, describes the wonderful "Art Fiesta" that is happening this weekend in Chico, CA. I am sharing an outdoor booth with Linda Smith, an amazing mosaicist/photographer/painter, (and who happens to be my mother). What a turn out this first night brought! Dozens of people (maybe even over 100) poured in and out of our booth, and several made purchases. In my opinion, even if tomorrow and Sunday are slow, the whole thing was worth it because of how well tonight went.


So what is the secret to the success of THIS art show? I've been to other art shows that were attended by less people the whole weekend than came through tonight at the Art Fiesta. I chalk it up to these three ingrediants:
1) Amazing, unique and "artsy" venue (The Matador Motel in Chico)
2) The "Cantina" selling margaritas
3) Great weather!


Thank you ChiVAA for putting together such a great event for Chico Arts! Thank you also to the Matador Motel for opening your doors with such warm and generous hospitality!

Thursday, April 12, 2012

To Craft Or Not To Craft

There is a reason that the phrase, "starving artist" is a phrase. It is because most artists do not make a living selling their art. I am one such artist. However, I create art because I enjoy it, not because I am trying to make money. There's another facet to being a "starving artist". That is that it takes money, oftentimes, to create art, and unless you are wealthy, you have to earn extra money somehow in order to continue to create art. I am a mosaic artist so I need mosaic materials in order to create my art.  I am pretty creative with how I gather my materials: broken dishes, broken glass, yard sale leftovers on the side of the road marked "free", thrift stores and yard sales all provide much of my materials. Also most people I know, know that I am a mosaic artist, and so I am always having people bring me chipped and broken dishes. Dishes are fun to work with, but there are so many other wonderful materials to mosaic with. I recently wanted to create an art piece using a form of Italian made glass called Smalti. Smalti must be purchased and it is expensive. I spent over $100 in materials just to make this piece. Will I recoup my costs and the value of my time if I sell my piece? Well, it would depend on how much I charged for the piece. That is another blog post.
    That leads me to my title for today's post: "To Craft Or Not To Craft". In order to make some extra money to buy materials so I can create fine art, I often make "crafty" things to sell. I mosaic picture frames, flower pots, mirrors, and signs. I do well selling them in outdoor art shows and shops. People in my small community usually do not go to an outdoor art show and spend $300 on a piece of art. They will, however, spend $20-$40. I am going to be in an outdoor art show next month and have been spending all my time over the past four months making lower price-point crafty items to sell at this show. "All my time" equates to about 2 to 6 hours in my studio per week. (I have a 4 year old and a baby, so at this point in my life I do not devote more time than that to my art. I know this is just a season of life, and later in life, when my children are older, I will put in more time in my studio.) I enjoy making crafty things in part because they are quick and bring in revenue. I also find value in making crafts because it helps my fine art: I can experiment with adhesives, tesserae, technique and design on a piece that is smaller and more expendable if I happen to screw it up! It also keeps me humble because there seems to be an imaginary platform that some fine artists put themselves on, which keeps them "above" crafting. Although I do enjoy crafting and find value in it, I emotionally connect more with art that is more abstract and plays with texture and color. I get more satisfaction and enjoyment from creating this type of art. And, as the weeks creep by, my fine art ideas and sketches and plans collect dust and cobwebs in my mind. I am chomping at the bit to get in my studio and flex my more artistic muscles and create fine art again. But, if I don't make the crafty items, I won't make money so I can buy materials to create fine art. My fine art is, therefore, codependent on my craft creations.
   The conclusion? Embrace it. My year is just simply broken up into months of craft followed by a month or two of fine art. It is a cycle that needs to be right now. So rather than buck against it, I will embrace it!  Craft away!

Sunday, March 25, 2012

Finding Inspiration

I recently went to see the documentary, "A Not So Still Life" about Seattle glass artist Ginny Ruffner. After the film, she was there at the event to answer questions from the audience. One person asked her where she got her inspiration for her pieces on an on-going basis. I liked her answer. She said, "thinking". She said she spends a lot of time in her garden thinking. She reads and then thinks about it. As she thinks, ideas are allowed to form and then grow and journey through her mind until reaching their destination as "inspiration" for another art work. With today's technology, we are often always "plugged in" and do not allow our minds enough quiet so it can just "think" and traverse and explore on its own. I would like to allow this to happen more often, as I seek to stay "inspired". Tonight, as I worked in my studio, I didn't turn on my radio as I usually do. Instead I sat in silence for two hours working and allowed my mind to just think. Other ways to find inspiration and to keep your mind creative are:
- Be out in nature: go to a park; take a nature hike; visit a river; go to the ocean; go to the forest. Look around for beauty and ask yourself "Why is it beautiful to me?"
- Look at art in your field but also in other fields. Are you a painter? Look at stained glass art or woodworking or sculpture. Are you a mosaic artist? Look at fabric art or metal art or ceramics. There are so many ways the human mind can express itself in art that it may open your mind to see things on a different level if you are looking at other art other than in your field. You will be able to deepen your expression in your own field, and may even branch out into another!
- Talk to other artists. Talk to new, budding artists because their mind's are fresh and excited and the way they look at their art is sometimes more emotional than technical. Talk to very experienced artists because they often have very wise things to say that will get you thinking. Talk to other artists doing what you do so you can exchange stories, ideas and techniques.
- Read. Read about science, archeology, architecture, nature, the lives of innovators. Look at magazines and photo books in these fields. I like to look at those books that have amazing nature photos of odd and unique natural phenomenons.
-Get to know and study the ultimate artist- God, the creator of all the beautiful "art" in the natural world. I find I am inspired to create after reading God's Word, the Bible, or spending time thinking about Him and what He has done in my life. Be thankful and praise Him and you may find yourself creating art as a response to Him. That's the best kind of art because it is motivated and created from a place that is not self-centered. It has a higher calling.

So, open your mind and think and don't limit yourself, and you will find creativity coming alive in new and exciting ways.

Tuesday, January 10, 2012

Setting Artistic Goals for the New Year

This New Years I was actually asleep by 10pm. But that doesn't mean that I don't wax sentimental during the New Year. I have made an unofficial "resolution" list- things I would love to see myself doing, doing differently, doing better. Many of my goals and resolutions came in the area of my artistic life. I think setting goals and thinking about the year ahead is a great way to stay inspired and motivated to keep practicing your art form, especially if you are a busy person like I am. I have a 4 year old and a brand new baby on the way any day now. I won't be putting in that many hours in my mosaic studio at this point in my life, but that is OK because I have learned that working little bits at a time still gets the job done and creations made. Here are the goals I would love to see accomplished at this point for 2012:

1. Be a part of two or three art shows
2. Set aside Wednesday nights and Sunday afternoons for mosaic. I can do more days and times if I have it, but those are a priority.
3. Create a good balance of fine art, experimental art, and crafty art
4. Attend a mosaic workshop or class
5. Teach a mosaic workshop or class (something I have done the past 2 years)
6. Post a new blog post to this blog at least 2 times per month!
7. Stay flexible- life happens and new inspirations happen. To be an inspired artist, I have found that staying flexible and not putting myself in a box, is the key. The minute I begin to feel like my mosaic art is a chore, or my goals I have set a stressful homework assignment, I begin to lose inspiration and the "art" part of my craft fizzles. The new, the creative, the excitement is gone.

Just like signing up for a 5K run keeps me motivated to go to the gym, so does signing up for art shows keeps me motivated to keep creating. Why is that important? Because it is part of who I am. To suppress that part of me chains bits of my psyche, my personality and my heart. I am the best "me" when I allow creativity to flow through me, because God created me to be a creative person! So, Happy New Year! Happy goal-setting! Sign up for something so you stay motivated. Please share some of your goals in the comments on this blog! Maybe I will be inspired by your goals and add them to mine!